Water Lily Pond Construction: A Step-by-Step Guide
Building your own water lily pond is a rewarding project that brings tranquility and beauty to your garden. This guide breaks down the process into manageable steps, ensuring you create a stunning aquatic paradise for your water lilies and other aquatic plants. Whether you're a beginner or have some gardening experience, these instructions will help you build a pond you can enjoy for years to come.
Planning & Location
Before you start digging, careful planning is essential. Consider the following:
- Sunlight: Water lilies need at least 6 hours of direct sunlight daily.
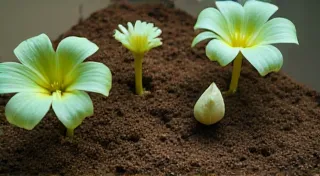
- Size & Depth: Consider the mature size of your water lilies. Deep water varieties need at least 24 inches of depth to prevent them from freezing in winter and to provide optimal growing conditions. Shallower varieties can thrive in ponds as little as 12 inches deep.
- Location: Choose a level area away from overhanging trees (falling leaves can create maintenance headaches). Consider visibility from your home – a pond that can be enjoyed from a window is a bonus!
- Utilities: Be absolutely certain you aren’t digging into buried utilities (gas lines, electrical cables). Call your local utility companies before you dig.
Image 1:
Step 1: Excavation
This is the most physically demanding part.
- Mark the Outline: Use stakes and string to clearly mark the desired shape and size of your pond.
- Digging: Start by removing the sod and topsoil. Excavate to your desired depth, creating shelves for different water depths, if planned. The edges should slope gently to allow easy access for wildlife and plants. Remember to create a level base.
- Soil Removal: Consider how you’ll handle the excavated soil. You can use it to create raised beds or berms around the pond.
Step 2: Preparing the Base
A smooth and level base is crucial for a successful pond liner installation.
- Remove Sharp Objects: Carefully remove any rocks, roots, or other sharp objects from the excavated area. These can puncture your pond liner.
- Sand Layer (Optional): A thin layer of sand (about 1-2 inches) can provide an extra layer of protection for the liner.
Step 3: Installing the Pond Liner
This is arguably the most critical step. Choose a high-quality, fish-safe pond liner. EPDM rubber liners are a popular and durable choice.
- Measure & Cut: Measure the excavated area, adding extra material (at least 1 foot on each side) for overlapping and securing the liner.
- Placement: Carefully unfold the liner and place it over the excavation. Let it settle naturally, ensuring it conforms to the shape of the pond.
- Secure the Edges: The easiest method is to weigh down the edges with rocks or pavers. For a more permanent solution, you can bury the edges or use a capping system.
Step 4: Filling the Pond
Slowly fill the pond with water, allowing the liner to fully settle and stretch. As the pond fills, adjust the liner, pulling out any wrinkles or folds.
Step 5: Planting Your Water Lilies
Once the pond is full, it's time to plant your water lilies.
- Planting Baskets: Water lilies are typically planted in specialized planting baskets filled with aquatic potting mix.
- Placement: Place the planting baskets on shelves or directly on the bottom of the pond, according to the water lily’s depth requirements. Use plant rocks or bricks to secure the baskets.
Step 6: Final Touches
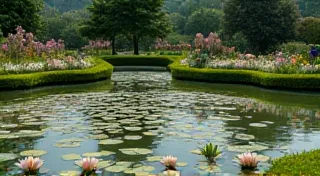
Add decorative rocks, bog plants, and other aquatic plants to create a thriving ecosystem. A small fountain or aerator can help oxygenate the water.
Image 3:Building a water lily pond is a labor of love, but the rewards are immeasurable. Enjoy the beauty and tranquility of your own aquatic paradise!